

How to do a Snellen test at home?
Table Of Contents
Snellen Test At Home?
Suppose the time has come to go to the eye specialist’s office. However, we would like to do a quick Snellen visual acuity eye exam test at home as a self-evaluation before our appointment. Can we do this? Yes, We can!
You can use the same instructions to perform a Visual Acuity Test with our Tumbling E Chart, Or Our Landolt C Chart!
Why might we want to perform a Snellen Visual acuity Eye Exam at home?
- We don’t want to be surprised by the results.
- We want to check our eyesight more frequently overall.
- Our eyesight feels tired, and we want to verify that our visual acuity is still good.
- Eyesight is subjective, and it feels as if we do not see as clearly, but is this the case? A quick test can help us understand our baseline.
We’ll learn how to:
- Perform a Snellen Visual Acuity test at home
- How visual acuity is measured
- How to interpret the results
We also have a Free Snellen Chart for you to download as a PDF!
Why doing A visual acuity eye exam at home
We all know that having good visual health is very important. Hence, keeping track of our regular check-ups with the ophthalmologist or optometrist is crucial.
We can add to this by performing a quick visual acuity eye exam at home to help us catch any anomalies in our vision early and monitor our development.
Therefore, performing a quick visual acuity exam at home is a good idea and will reveal the state of our visual acuity. It will also allow us to keep an eye on the visual health of our family.
(Sadly, we often go to an eye specialist when eyesight loss has already progressed significantly)
So to be clear! Taking a Snellen eye exam at home does not mean we should not go to a vision specialist.
Performing a Snellen Eye Exam at home will, at maximum, indicate the state of our visual acuity. It will not determine at any time what our diagnosis is. Also, consider that a Snellen visual acuity test is merely one of many eye tests that an eye doctor will perform to check your eyesight as a whole.
So, proper eye exams and their diagnosis are a task that we should entrust to the ophthalmologist or optometrist only.
Regular eye examinations are recommended as it is essential to detect eyesight problems in time. So remember to ensure you have your next appointment with the eye specialist for you and your family scheduled in your agenda!
What is a Snellen Visual Acuity Test?
A Snellen Test is a standardized eye exam that will enable us to measure our visual acuity and compare it to the baseline of 20/20 vision.
We can conduct a visual acuity eye exam at home without the assistance of a trained eye care expert. However, As we have already stated, the findings of performing this test at home should only be considered as a guide and do not replace our doctor’s appointment.
Snellen Test At Home - Step-by-step
- Step One: Preparation: What do we Need?
- Step Two: Calculate Distance
- Step Three: Perform The Test
- Step Four: Interpret Results
STEP ONE: What do we need to perform a visual acuity test at home?
Depending on the tools available at home, we can conduct a vision test in several ways.
- We can do a visual test at home with a Snellen chart printed on a sheet of paper
- We can have the Snellen Chart in PDF online and do the test from the screen of our computer
At the end of the article, we have a downloadable and or printable Snellen chart in PDF for you so that you can perform the visual acuity test at home.
To perform a visual acuity test at home, we need to prepare the environment!
- We need a well-lit room and a chair to sit while performing the test.
- A piece of paper and a pencil (or pen) will be helpful to write down the letters (or symbols) we see so that we can later check our results.
- We also need a proper eye chart (see Visual Acuity Test PDF at the bottom of this page) in terms of its letters (or symbols) and size.
- The visual acuity test can be fixed to a vertical surface with tape, thumbtacks (if the chosen surface is a cork), magnets (if we hang it on the fridge), etc.
- We can also ask someone to hold the sheet while we perform the test, although this is not an ideal option.
- We need a meter to measure the distance from the test.
- And finally, we will need something to cover our eye, the most comfortable is to use an eye patch, as it will allow us more freedom of movement and stay focused on the test. If not, we can also cover our eye gently with our hand, without pressing the eyelid or with a handkerchief or cloth that does not allow us to see the covered eye.
Once we have prepared everything we need to perform the Snellen acuity Test at home, we can start with the test by doing the following:
STEP TWO: Calculate your distance from the snellen Chart
We must check how far away we should stand from the Snellen Chart to perform the test. The distance depends on the height of the first letter if you have a printed version of the Snellen Chart.
(You can alter that distance between the Chart and the person who is performing the test if you are doing the test using a computer screen. We’ll explain this later in more detail.)
So, with our ruler, meter’s help, we will measure the height of our first optotype on the table (the E in the first row).

If we have chosen and printed this PDF Snellen Chart, we will see how the letter E in height measures 4 cm (40 mm) or 1.575 inches.
If so, we must complete the test at a distance of 2,75 m or 108.25 inches, or 9,02 feet.
However, double-check this, as some printer settings might alter the size of the letters. So, the largest letter should be 4 cm or the distance should be adapted.
If the size is different: We can re-calculate the distance based on the height of the largest Letter E.
Once we have this result of our measurement of the letter E or first optotype, we can figure out at what distance from the Chart we have to be to take the test. We will use the following calculator to help us do that! We have added a calculator in centimeters & millimeters or in inches and feet.
With the result from the calculator we now know exactly at what distance we should position ourselves from the test.
However there is an alternative situation:
What to do If we do not have a printer or simply do not want to print the Snellen test? We can do the test from the PDF on our desktop or laptop computer screen.
However, image we do not want to move too far away from the screen to perform this test because we have limited space; then we can simply adjust the letter size that appears on our Snellen Chart by using the zoom function.
So, if we are sitting closer to our screen, we’ll need to adjust the size of the letters depending on our distance from the screen.
How can we know what the height of the first E or Optotype should be?
- Step one: To do this, we will measure the distance from our eyes to the computer screen.
- Step two: With the help of the following calculator, we will determine what size the first optotype on the Snellen Chart should be.
We have added the calculators in centimeters and in inches:
Now that you know what size the first letter or optotype should be, you can use the zoom function to adjust the Snellen Chart PDF until you can confirm that the size of the first letter matches the result that the calculator gave.
Step Three: Perform The Snellen Test
- Get your pen and paper ready to take notes of what we see.
- Get positioned at the correct distance from the Snellen Chart.
- We will sit down and place the Snellen Chart at our eye level to perform the test.
- Cover one eye using an eye patch or gently covering it with your hands.
- Read and write down each letter of each line for your first eye.
After you’ve done the first eye, switch the eye patch or hand cover to the other eye and perform the test again for the second eye.
NOTE: If we use glasses or contact lenses, we will typically use them to perform the test.
NOTE: If someone is with us to help, they can be the ones to write down if you visualize each letter and each line correctly.
After we perform the test, we will use our notes to compare it with the Snellen Chart and, from that, derive the result of our visual acuity test.
Step Four: How to determine the Snellen Chart test results?
Suppose you have performed the test for each eye; you will now have two sets of results. One result from our right eye and one result from our left eye.
So, how do we interpret the results obtained in the Snellen test?
To determine the visual acuity for each eye, we must interpret the results obtained by looking at the fractional numbering on the right side of our Snellen Chart.
The results obtained will reflect our visual acuity for each eye.
NOTE: Specific rules apply for a more detailed determination of the visual acuity based on how many correct results you had on the lines where you perhaps started to falter; however, we will not get into this at this time since the purpose of performing this test at home is merely to get a quick sense of the state of your visual acuity.
As a rule of thumb, if you did not clear the 20/20 vision baseline, you should schedule a visit with your eye doctor if you haven’t already.
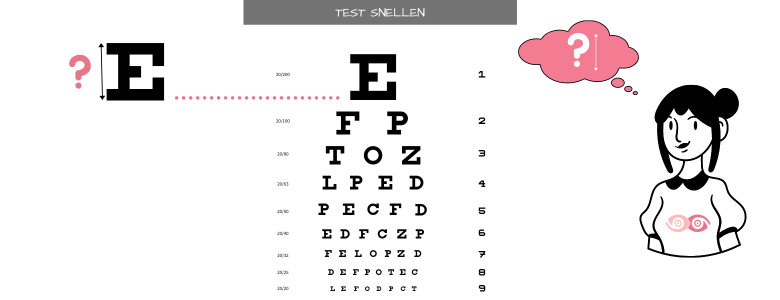
Let’s look at our Snellen Visual acuity test. We notice that our Snellen Chart has nine rows of letters of increasingly smaller size as we move downwards.
Each row of letters represents a Snellen fraction based on the distance measured in feet, starting from the 20/200 fraction, which is the largest to the 20/20 fraction. (for more information on Snellen fractions and their interpretation, please review our article: Visual Acuity Test – Snellen Test).
When we reach the last row of our Snellen test, at the Snellen fraction 20/20, we are considered to have a nominal visual acuity.
However, having a 20/20 vision does not mean that our vision is perfect. However, it does refer to the sharpness of our vision and the clarity at which we can see at a certain distance, aka visual acuity.
If the value we obtain in our result is lower, it means that our visual acuity is below the baseline. On the contrary, if it is above the 20/20 baseline, it means that our visual acuity is better than average.
EXAMPLE: Let’s imagine that our test results showed a 20/63 fraction for one of our eyes.
interpret the results obtained from the Snellen test in the following example?
Example: Let’s imagine that our test results showed a 20/63 fraction for one of our eyes.
To better understand how to interpret this fraction, we’ll convert it into decimals which are easier for us to understand.
Note: Scientists and scientific literature often use an even different annotation style and convert the results to LogMar.
However, let us stick with our decimal conversion so that we can interpret the results as percentages!Following our example of 20/63, its decimal value would be equivalent to 0.32, as we can see in the attached table, which is the same 32% of 100%.
Example 2:
Imagine that our test result is 20/25. The equivalent in decimals would be 0.80 or 80% of 100%.
In this table, we can check each of our two results obtained in our Snellen test at home:
Snellen Fraction | Decimal |
20 / 200 | 0,10 |
20 / 160 | 0,125 |
20 / 125 | 0,16 |
20 / 100 | 0,20 |
20 / 80 | 0,25 |
20 / 63 | 0,32 |
20 / 50 | 0,40 |
20 / 40 | 0,50 |
20 / 32 | 0,63 |
20 / 25 | 0,80 |
20 / 20 | 1,0 |
And we’re done with our home vision test! Congratulations!
Now if we want, we can write down our results, and the next time we go to our vision specialist, we can show him our results or keep them as a reference.
To finish… Don’t forget to download your Visual Acuity Test PDF
As we indicated at the beginning, this Snellen test is designed to be done at home, both printed and to do it from the PDF on the screen of our computer, without using paper.